Drone Photography Cheat Sheets — 50 sheets
Printable field sheets for drone pilots — quick settings, key tips and one-line memory hooks. Download one card, a full set, or the whole booklet.
Opens print view — choose “Save as PDF”
Camera Basics in the Air
Core camera operations every drone pilot must own. · 8 sheets
 FlyDronePRCamera Basics in the Air
Aperture in the Air
How wide the lens opens — on most drones it's fixed, so know what that means.
QUICK SETTINGS
KEY TIPS
- 1Most drone apertures are fixed — you can't stop down for more depth of field.
- 2The good news: at altitude, focus distance is huge, so nearly everything is sharp anyway.
- 3Wide apertures (f/1.8) drink in light — great for dawn, dusk and night flights.
- 4Since aperture is locked, your exposure tools are shutter speed, ISO and ND filters.
Remember: Aperture is fixed on your drone — exposure is a shutter, ISO and ND game.
FlyDronePRCamera Basics in the AirShutter Speed & Motion Blur
How long the sensor sees light — freezes the scene or paints motion.
QUICK SETTINGS
KEY TIPS
- 1A drone is never perfectly still — hover drift blurs slow-shutter photos.
- 2For sharp stills, stay at 1/500s or faster, especially in wind.
- 3For cinematic video, match shutter to double your frame rate (4K/30 → 1/60s).
- 4Slow shutter at night = light trails and streaky city lights, if the drone holds still.
Remember: Photos want fast. Video wants double the frame rate. Wind wants faster.
FlyDronePRCamera Basics in the AirISO in Flight
The sensor's sensitivity — your last resort for brightness, not your first.
QUICK SETTINGS
KEY TIPS
- 1Small drone sensors show noise early — protect ISO 100 whenever light allows.
- 2Raise ISO only after shutter and ND choices are made.
- 3A little grain beats a blurry photo: raise ISO before dropping below 1/250s.
- 4Shoot DNG so noise reduction in editing has more to work with.
Remember: Low ISO = clean. High ISO = brighter but grainier. Grain beats blur.
FlyDronePRCamera Basics in the AirThe Exposure Triangle — Drone Edition
Shutter and ISO do the heavy lifting when aperture is fixed.
QUICK SETTINGS
KEY TIPS
- 1Change one side, compensate with another to keep brightness.
- 2In bright Caribbean sun, an ND filter is your fourth corner.
- 3Video locks your shutter (180° rule) — so ISO and ND carry the load.
- 4Check exposure with the histogram, not the screen — sun glare lies.
Remember: Fixed aperture means shutter, ISO and ND run the show.
FlyDronePRCamera Basics in the AirWhite Balance from the Sky
Tells the camera what 'white' is so Caribbean colors stay true.
QUICK SETTINGS
KEY TIPS
- 1Auto WB shifts mid-flight as you pan from sea to land — lock it manually for video.
- 2Locking WB keeps color consistent across a whole shoot.
- 3Shoot DNG and you can re-set white balance freely in editing.
- 4Ocean scenes fool Auto WB — the camera over-corrects all that blue.
Remember: Auto WB drifts mid-flight. Lock it, or shoot DNG and fix it later.
FlyDronePRCamera Basics in the AirResolution & Frame Rates
More pixels = sharper. More frames = smoother or slower.
QUICK SETTINGS
KEY TIPS
- 1Higher frame rates need more light — shutter runs twice as fast.
- 224fps looks cinematic; 30fps looks like broadcast TV; 60fps looks hyper-real.
- 3Slow motion (120fps) is for drama: waves, birds, reveals.
- 4Bigger files fill cards fast — 4K/60 eats roughly twice the space of 4K/30.
Remember: Pick frame rate for the story: 24 cinematic, 30 standard, 60 smooth, 120 slow-mo.
FlyDronePRCamera Basics in the AirPhoto Modes: Single, HDR, AEB, Burst
Four ways to catch the moment from the air.
QUICK SETTINGS
KEY TIPS
- 1AEB is the landscape pilot's best friend — bracket, then merge in editing.
- 2HDR mode is fast and good, but AEB + DNG gives you more control.
- 3Burst mode catches boats, birds and breaking waves at the perfect instant.
- 4Avoid HDR/AEB in strong wind — frames shift and ghosts appear.
Remember: High contrast scene? Bracket with AEB. Moving subject? Burst it.
FlyDronePRCamera Basics in the AirRAW (DNG) vs JPEG
Ready-to-share convenience vs total editing control.
QUICK SETTINGS
KEY TIPS
- 1DNG keeps the sensor's raw data — blown skies and dark shadows can be rescued.
- 2JPEG bakes in contrast, color and sharpening — great when the shot is perfect.
- 3White balance is fully re-settable in DNG; in JPEG it's permanent.
- 4Storage is cheap, memories are not — record both.
Remember: JPEG for speed. DNG for the shots that matter. Record both.
ND Filters & Exposure Control
Sunglasses for your drone — the secret to cinematic footage. · 6 sheets
FlyDronePRND Filters & Exposure ControlWhy ND Filters Matter for Drones
In bright sun, your shutter runs too fast — ND filters slow it down to cinematic speed.
QUICK SETTINGS
KEY TIPS
- 1Aperture is fixed, so in bright sun the camera can only raise shutter speed — that's what makes footage look choppy.
- 2An ND filter blocks light like sunglasses, letting the shutter come back down to 1/60s.
- 3Photos don't need ND — only video does. Blur in video is smooth; blur in photos is a mistake.
- 4Puerto Rico's midday sun almost always needs an ND for video.
Remember: No ND in bright sun = choppy video. ND = the cinematic look.
FlyDronePRND Filters & Exposure ControlND Strength Guide
Bigger number = darker glass. Match the filter to the sun.
QUICK SETTINGS
KEY TIPS
- 1Start with the light that hits the scene, then fine-tune with ISO if needed.
- 2The goal: shutter reads 1/(2×fps) on the exposure meter at ISO 100.
- 3Buy the set (ND8/16/32/64) — one filter can't cover a Caribbean day.
- 4Carry them in a hard case; salt air and sand scratch coatings fast.
Remember: Match the ND to the sun: 8 at dawn, 16 mid-morning, 32–64 at noon.
FlyDronePRND Filters & Exposure ControlThe 180° Shutter Rule
Shutter speed = double your frame rate. The oldest trick in cinema.
QUICK SETTINGS
KEY TIPS
- 1Doubling the frame rate gives each frame natural motion blur — that's what 'cinematic' means.
- 2Set frame rate first, shutter second, then pick the ND that makes the meter happy.
- 3If you can't hit exactly double, err on the faster side, not slower.
- 4Break the rule on purpose only for staccato action looks (think war films).
Remember: Frame rate × 2 = shutter. Set it with ND, not ISO.
FlyDronePRND Filters & Exposure ControlPolarizers (CPL)
Cuts glare, deepens skies, and lets you see into the water.
QUICK SETTINGS
KEY TIPS
- 1A CPL kills reflections on the sea — reefs and sandbars suddenly appear.
- 2The effect is strongest when the sun is to your side, weakest shooting toward or away from it.
- 3Because the drone moves, the effect changes as you turn — re-check after yawing.
- 4ND/PL combos exist: one filter does both jobs.
Remember: CPL = sunglasses that kill glare. Strongest with the sun on your shoulder.
FlyDronePRND Filters & Exposure ControlWhen NOT to Use an ND
ND filters steal light — sometimes you can't spare any.
QUICK SETTINGS
KEY TIPS
- 1Photos want fast shutters anyway — an ND just forces noisy high ISO.
- 2At dawn and dusk, light is precious; an ND pushes ISO into grain territory.
- 3Flying at night with an ND is like wearing sunglasses in the dark.
- 4The wrong habit: leaving yesterday's ND32 on for today's sunset flight.
Remember: ND is a video tool for bright light. Photos and darkness want it off.
FlyDronePRND Filters & Exposure ControlReading the Histogram Mid-Flight
Your screen lies in the sun. The histogram doesn't.
QUICK SETTINGS
KEY TIPS
- 1Bright Caribbean sun makes every screen look darker than the file really is.
- 2Data climbing the right wall = blown white sky or water — unrecoverable.
- 3Data piled on the left wall = crushed black shadows.
- 4Slight right-of-center ('expose to the right') gives cleaner DNG files.
Remember: Trust the graph, not the glare. Keep the mountains off the walls.
Composition from Above
Arrange the frame so the eye goes where you want it. · 8 sheets
FlyDronePRComposition from AboveRule of Thirds from the Sky
Place key elements on the gridlines, not dead center.
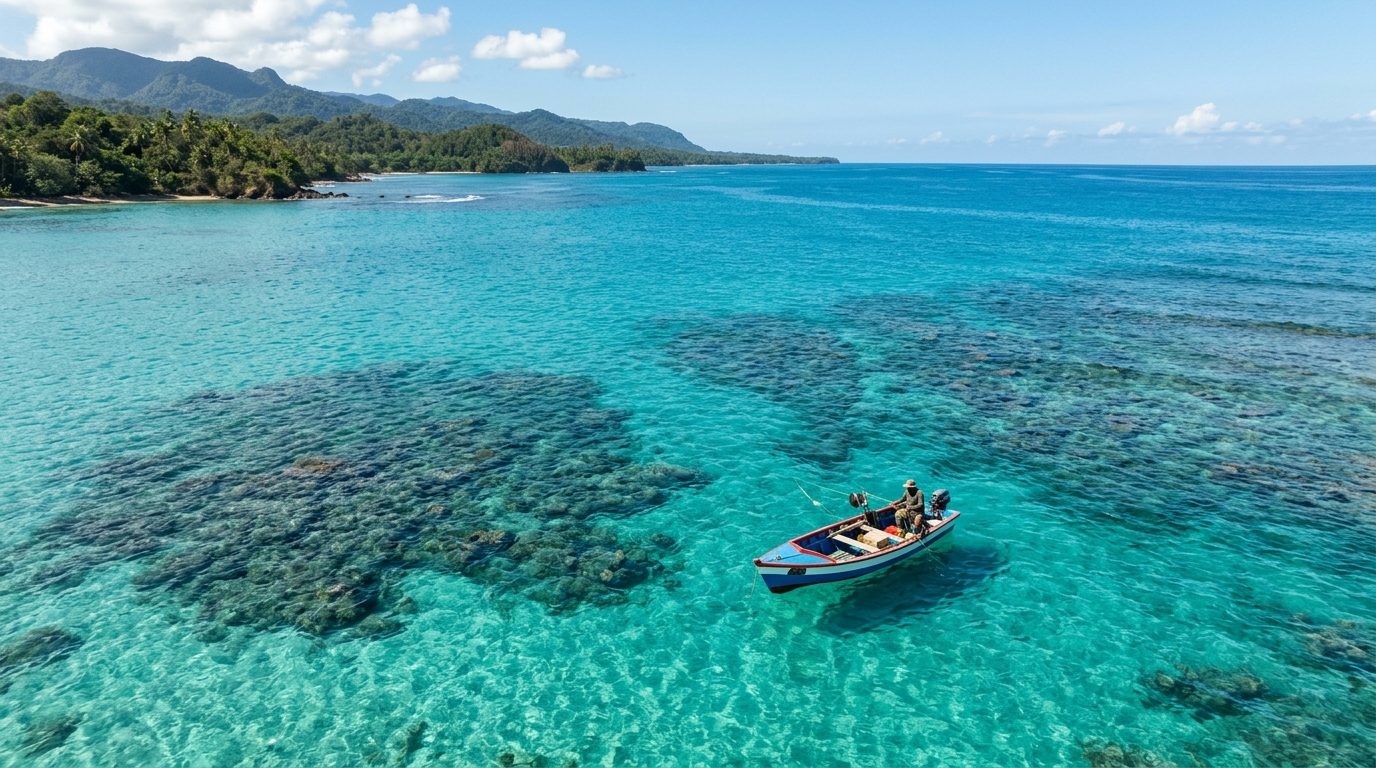
QUICK SETTINGS
KEY TIPS
- 1Enable the 3×3 grid in the Fly app — compose with it live.
- 2Put the horizon on a third line: sky drama = low horizon, water patterns = high horizon.
- 3A boat, pier or person lands best on an intersection point.
- 4Rules are tools: dead-center works for symmetry — break it on purpose.
Remember: Grid on. Subject on a line, not in the middle.
FlyDronePRComposition from AboveLeading Lines
Roads, rivers and shorelines pull the eye into the scene.
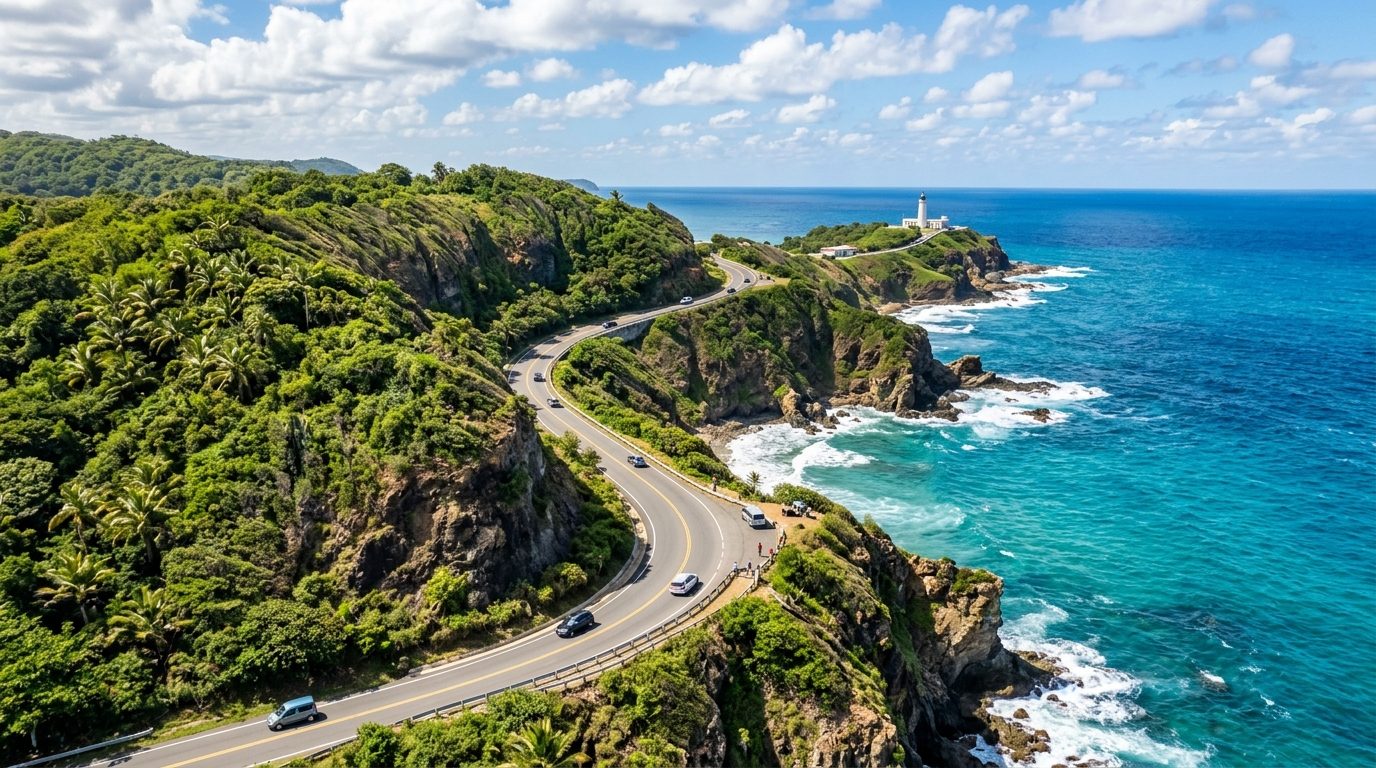
QUICK SETTINGS
KEY TIPS
- 1From the air, every road, river and beach edge is a line — aim them at your subject.
- 2A line entering from a corner is stronger than one entering from the middle.
- 3S-curves (rivers, winding roads) keep the eye wandering longer.
- 4Fly the line: a slow forward move along a road is a classic cinematic shot.
Remember: Find a line, point it at the subject, let it pull the viewer in.
FlyDronePRComposition from AboveTop-Down (Nadir) Shots
Gimbal straight down — the world becomes abstract art.
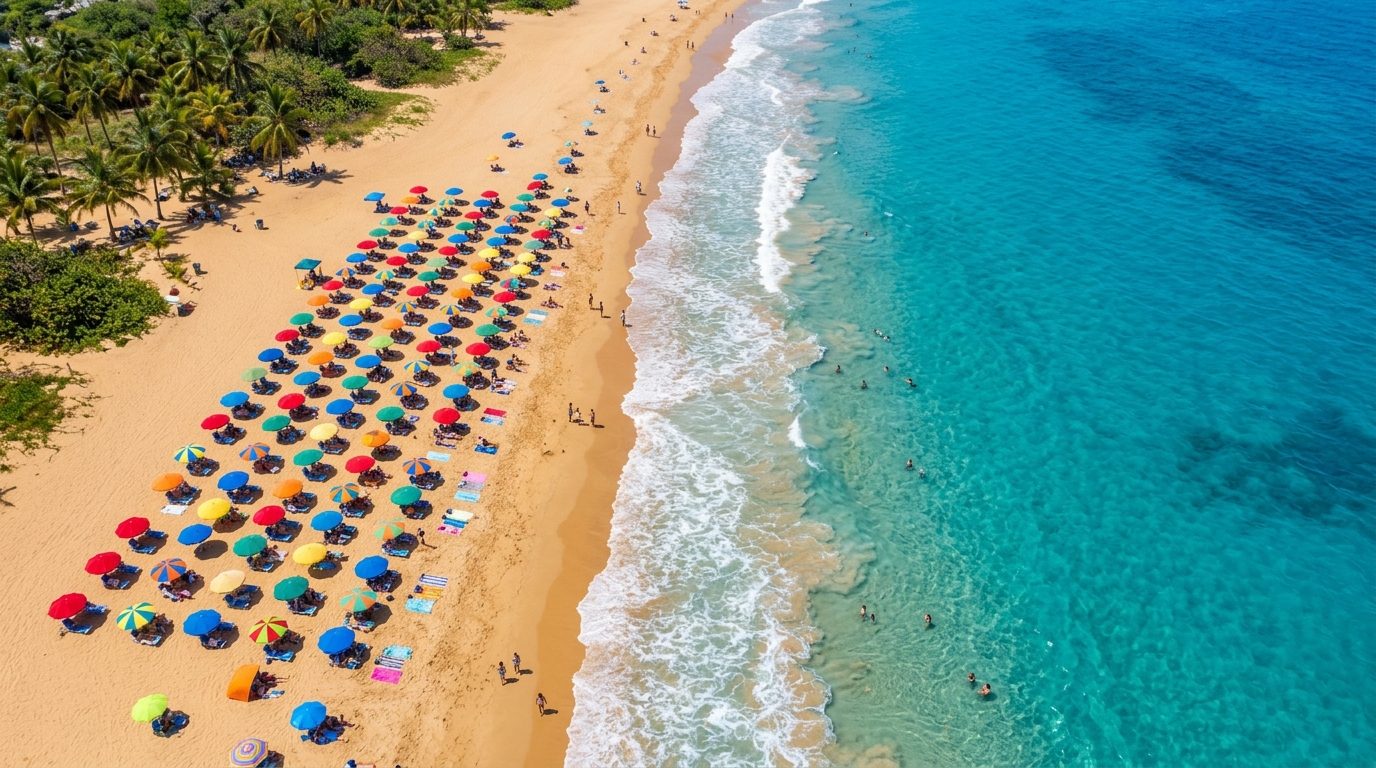
QUICK SETTINGS
KEY TIPS
- 1Straight-down shots turn beaches, fields and parking lots into patterns people can't stop looking at.
- 2Umbrellas, boats and waves become shapes and colors — compose them like paint.
- 3Low sun throws long shadows that add depth; noon sun flattens everything.
- 4Check the frame for the drone's own shadow before you shoot.
Remember: Point straight down and the familiar turns abstract.
FlyDronePRComposition from AbovePatterns & Textures
Fields, waves and rooftops — repetition is a subject by itself.
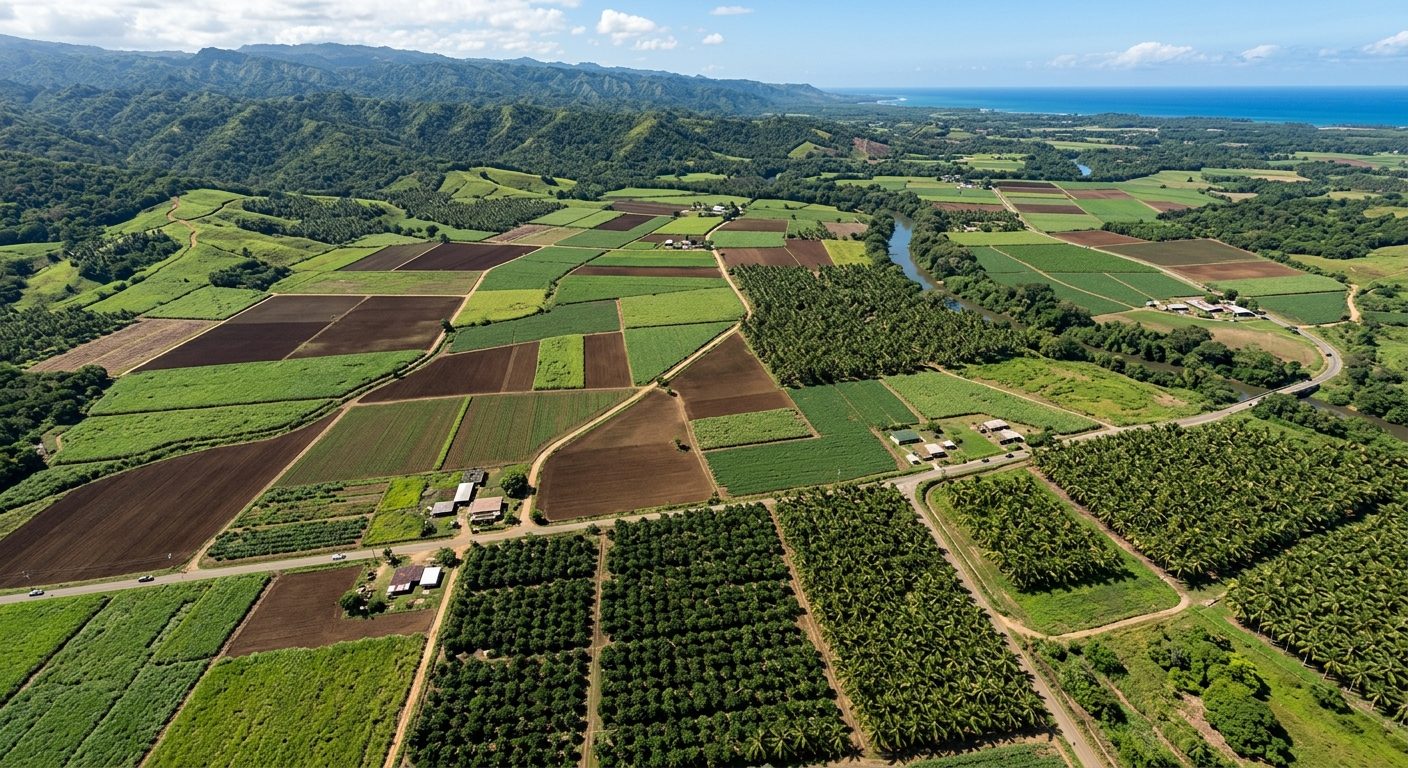
QUICK SETTINGS
KEY TIPS
- 1Let the pattern fill the entire frame edge to edge — no horizon needed.
- 2A single break (one red boat, one person) turns a pattern into a story.
- 3Side light at golden hour makes textures pop; overhead light hides them.
- 4Farm fields, salt flats and wave foam are Puerto Rico's pattern goldmines.
Remember: Fill the frame with repetition; one interruption makes the photo.
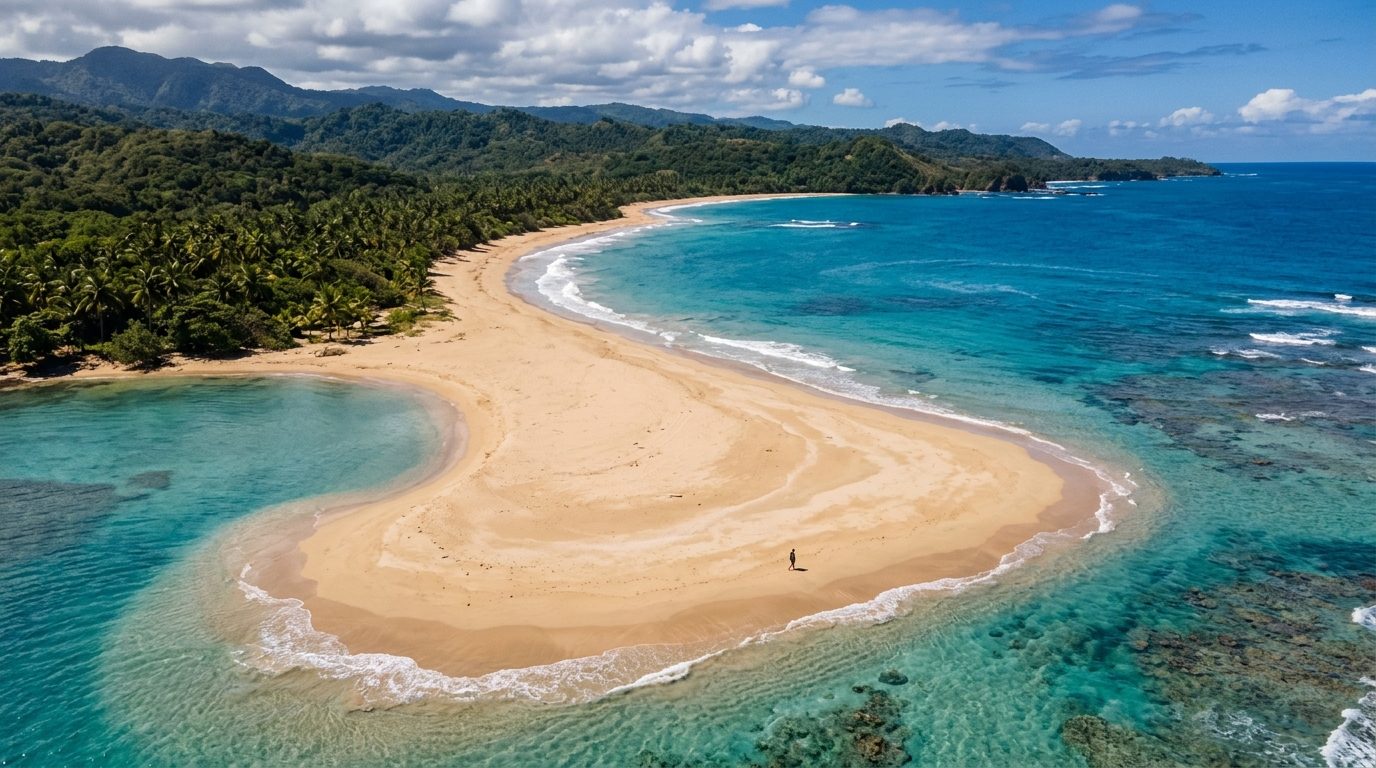
FlyDronePRComposition from AboveSense of Scale
Tiny people, huge landscapes — the drone's superpower.
QUICK SETTINGS
KEY TIPS
- 1A lone human on a sandbar instantly tells the viewer how vast the scene is.
- 2The higher you fly, the smaller the anchor — and the bigger the drama.
- 3Keep the tiny subject on a third line, surrounded by negative space.
- 4Ask permission or keep distance when people are the anchor — respect and rules first.
Remember: One small thing in a big place makes viewers feel the size.
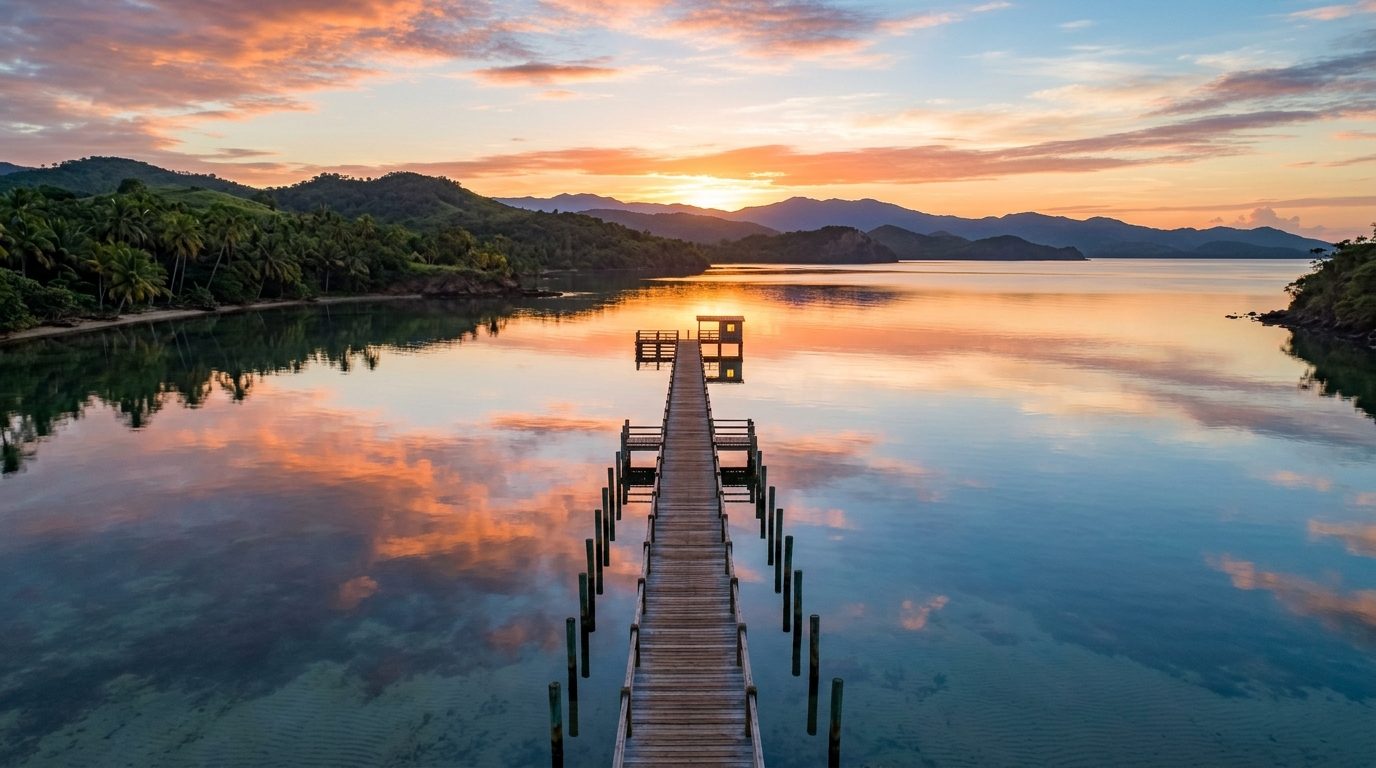
FlyDronePRComposition from AboveSymmetry & Reflections
Calm water doubles the world — use it.
QUICK SETTINGS
KEY TIPS
- 1Symmetry is the one time dead-center composition is exactly right.
- 2Glassy water at dawn reflects sky and mountains — arrive before the wind.
- 3Line the horizon up perfectly level; a 1° tilt ruins the mirror.
- 4Puerto Rico's bays and lagoons are mirror factories on calm mornings.
Remember: Mirror water = center the horizon and double the beauty.
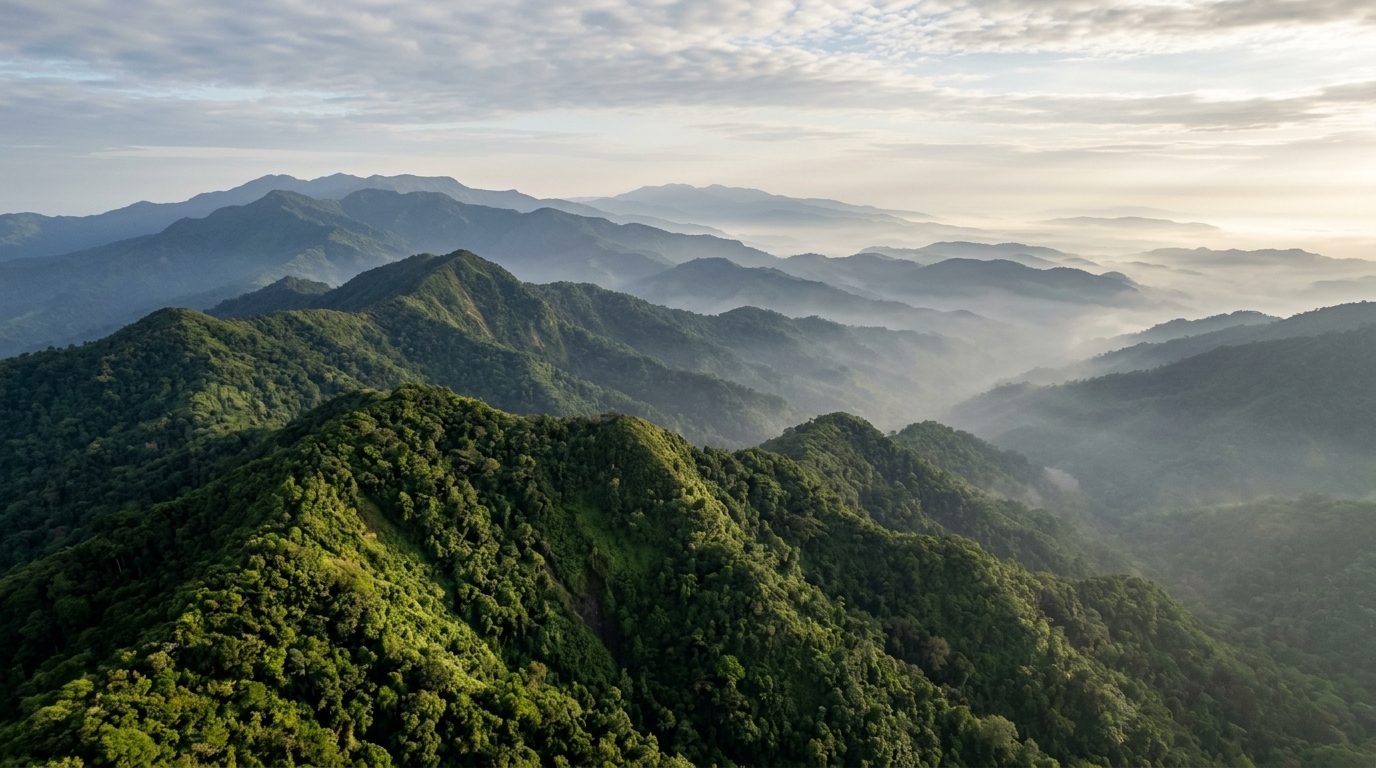
FlyDronePRComposition from AboveLayering at Altitude
Foreground, middle, background — depth is what makes aerials feel huge.
QUICK SETTINGS
KEY TIPS
- 1A flat top-down shot has no depth; a layered shot pulls viewers through the frame.
- 2Use a branch or rooftop edge in the near corner to frame the scene.
- 3Misty mountains (El Yunque) layer themselves — just shoot into the haze.
- 4Lower altitude + tilted gimbal often beats higher + flat.
Remember: Near, middle, far — three layers make a 2D photo feel 3D.
FlyDronePRComposition from AbovePlanning the Cinematic Reveal
Hide the scene, then unveil it — the signature drone move.
QUICK SETTINGS
KEY TIPS
- 1Begin behind palms, a hill or a rooftop so the money shot is hidden.
- 2Move two axes at once (rise + forward) for that floating cinematic feel.
- 3Slower is better — 10 to 15 seconds of movement, no sudden stops.
- 4Plan it backward: frame the ending first, then find where to hide.
Remember: Hide it, rise, reveal. Slow wins.
Light & Weather in Puerto Rico
The island's light is spectacular — and its weather is honest about limits. · 7 sheets
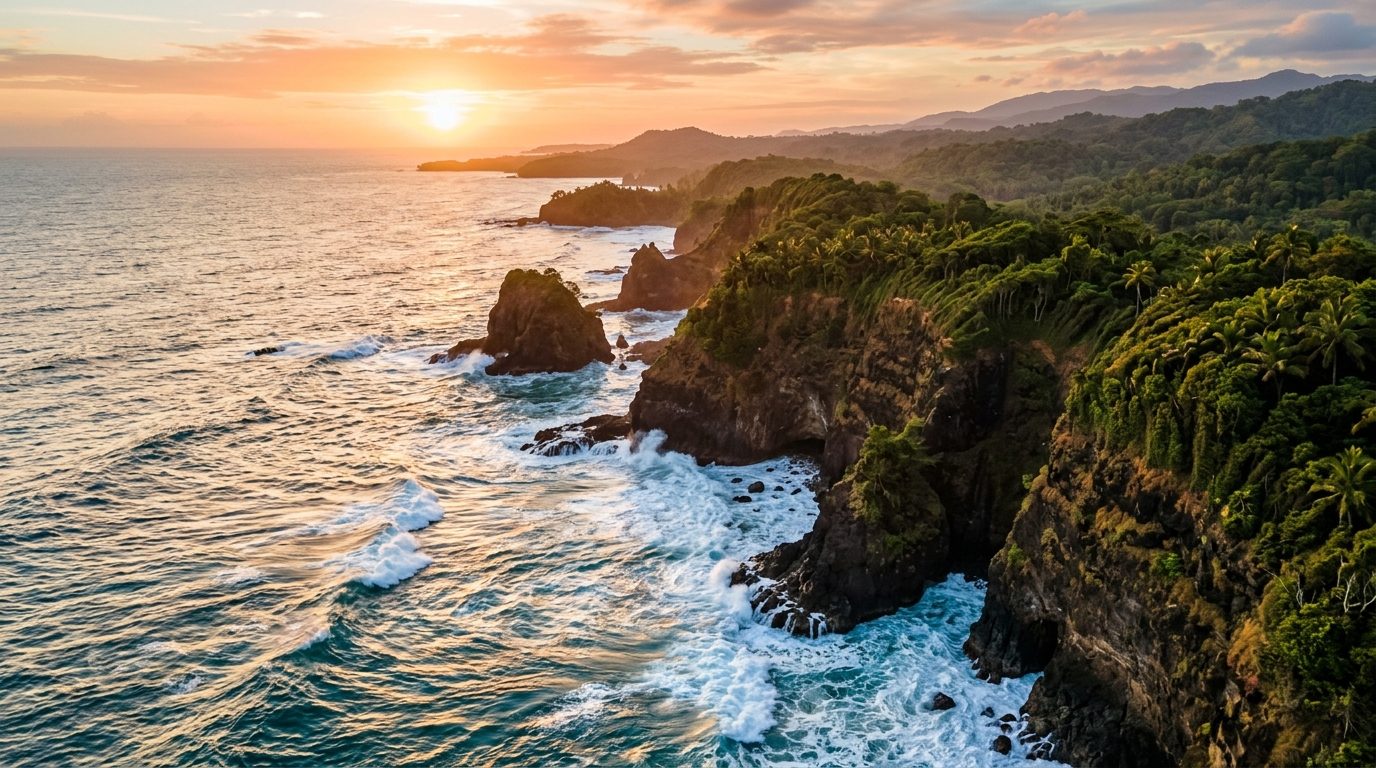
FlyDronePRLight & Weather in Puerto RicoGolden Hour Flying
The hour after sunrise and before sunset — when the island glows.
QUICK SETTINGS
KEY TIPS
- 1Low sun = long shadows, warm color, glowing water. The single best time to fly.
- 2The window is short — be in the air before the light peaks, not after.
- 3Sun-facing shots flare beautifully; sun-behind shots get saturated color.
- 4Batteries ready the night before. Golden hour waits for no one.
Remember: Be airborne before the light peaks — golden hour is short and ruthless.
FlyDronePRLight & Weather in Puerto RicoBlue Hour & City Lights
Twenty minutes of electric-blue sky with warm city lights.

QUICK SETTINGS
KEY TIPS
- 1Blue hour balances sky glow with city lights — after it, skies go black.
- 2Old San Juan and Condado are made for this: warm windows, deep blue bay.
- 3No ND at this hour — you're fighting for light now.
- 4Check night-flight rules: anti-collision strobe required after sunset.
Remember: Twenty minutes of magic: blue sky, warm lights. Strobe on.
FlyDronePRLight & Weather in Puerto RicoMidday Sun Strategy
Harsh overhead light isn't useless — it just shoots different subjects.

QUICK SETTINGS
KEY TIPS
- 1Overhead sun makes Caribbean water explode with turquoise — reef shots love midday.
- 2Top-down graphic shadows (palms, umbrellas) are a midday specialty.
- 3Avoid sweeping landscapes — flat light and blown highlights everywhere.
- 4Polarizer + midday = maximum see-through water.
Remember: Midday is for water color and shadow graphics, not sweeping vistas.
FlyDronePRLight & Weather in Puerto RicoClouds, Rain & Humidity
Island weather changes fast — read it before you launch.
QUICK SETTINGS
KEY TIPS
- 1Cloudy skies give soft, even light — great for patterns, rooftops and color.
- 2Rain and drones don't mix: moisture kills motors and electronics. Land at the first drops.
- 3Humidity fogs cold lenses — let the drone acclimate outside for 10 minutes before launch.
- 4Afternoon showers are the island's daily rhythm — fly mornings.
Remember: Clouds are a softbox. Rain is a landing order. Humidity needs patience.
FlyDronePRLight & Weather in Puerto RicoWind Limits & Stability
Wind at 100m is stronger than wind at your feet. Always.
QUICK SETTINGS
KEY TIPS
- 1Ground wind lies — it strengthens with altitude, especially at the coast.
- 2High wind = hover drift = blurry photos and fighting returns home.
- 3Fly out against the wind, return with it. Never the reverse.
- 4Trade winds are Puerto Rico's constant — learn to love mornings when they're calmest.
Remember: Out against the wind, home with it. Under 5 m/s for keepers.
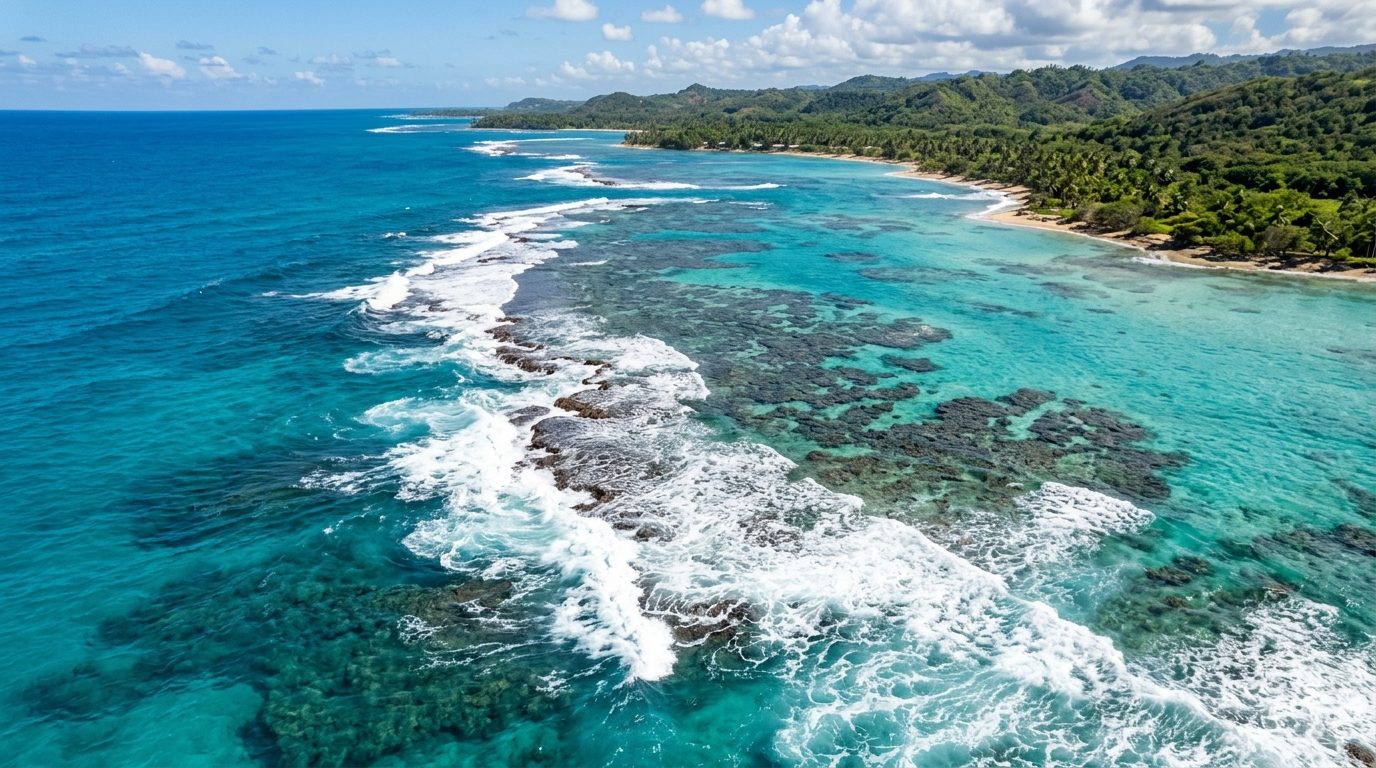
FlyDronePRLight & Weather in Puerto RicoCoastal Light & Salt Air
The coast gives you the best light — and the harshest environment.
QUICK SETTINGS
KEY TIPS
- 1Mid-morning sun penetrates the water — reefs and sandbars glow.
- 2Salt spray is invisible until your footage looks soft — check the lens every few minutes.
- 3Launch and land from a mat; beach sand + prop wash = sandblasted motors.
- 4Post-flight: wipe the body and props with a barely-damp cloth, then dry.
Remember: The coast is the best studio and the worst landlord. Clean after every flight.
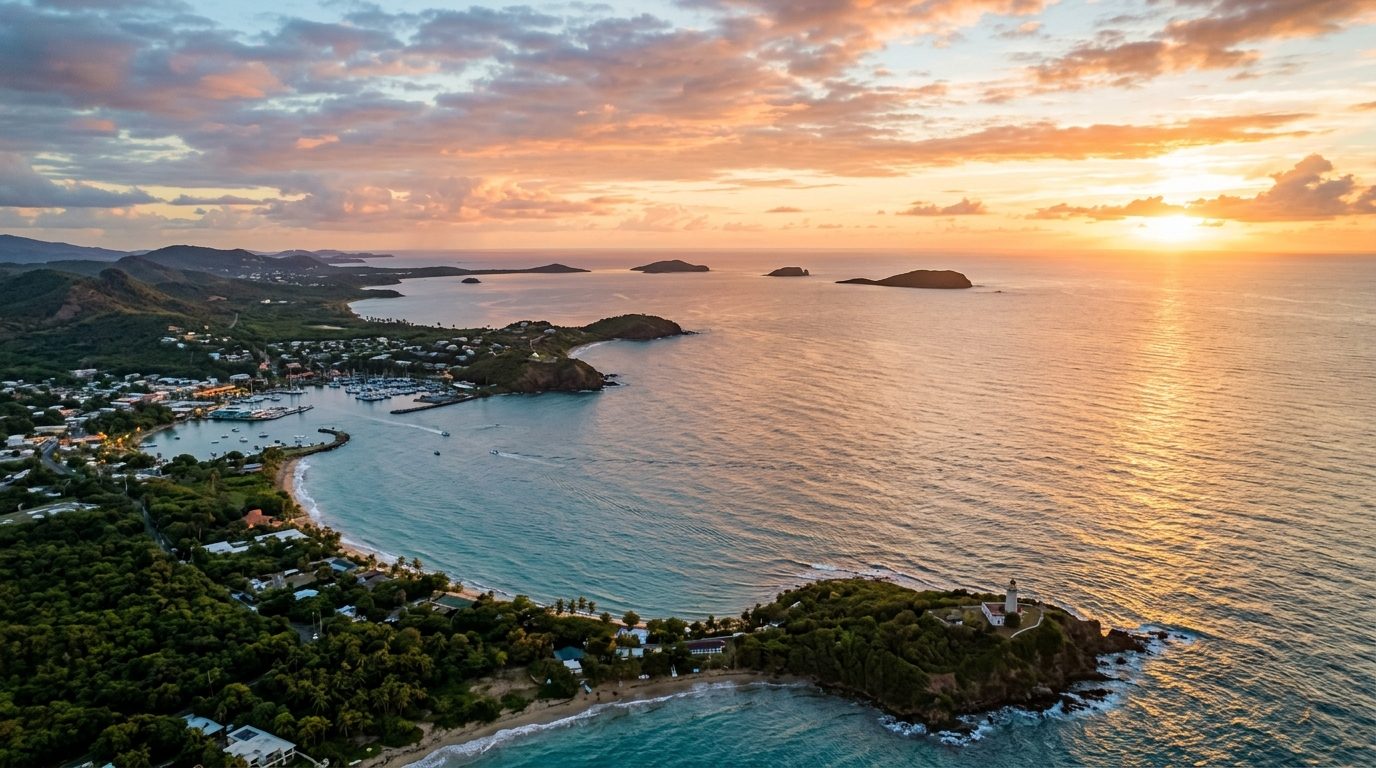
FlyDronePRLight & Weather in Puerto RicoSunrise vs Sunset
Same golden light, opposite personalities.
QUICK SETTINGS
KEY TIPS
- 1Sunrise wins on wind — the island is calmest right after dawn.
- 2Sunset light is warmer and dustier; sunrise is cleaner and cooler.
- 3Fajardo and the east greet the sun; Rincón and the west say goodbye to it.
- 4Scout at sunset, shoot at sunrise — you'll have the spot to yourself.
Remember: Sunrise for calm and solitude. Sunset for warmth and drama.
DJI Air 3S Field Settings
Preset recipes and gimbal craft for AeroChief's bird — and yours. · 8 sheets
FlyDronePRDJI Air 3S Field SettingsPre-Flight Camera Checklist
Sixty seconds on the ground saves the whole flight.
QUICK SETTINGS
KEY TIPS
- 1Format the card before every outing — mid-flight 'card full' is a heartbreak.
- 2Decide frame rate on the ground; changing it in the air wastes the light.
- 3Auto white balance drifts as you pan — lock it before takeoff.
- 4One thumbprint or salt haze ruins every frame. Wipe. The. Lens.
Remember: Card, frame rate, WB, grid, ND, lens — sixty seconds, every flight.
FlyDronePRDJI Air 3S Field SettingsCinematic Preset
The recipe for footage that looks like film, not a phone.
QUICK SETTINGS
KEY TIPS
- 1D-Log M looks flat and gray on purpose — it grades beautifully in editing.
- 2The magic trio: 24fps, 1/50s shutter, slow stick movements.
- 3Lower the gimbal pitch speed in settings for buttery tilts.
- 4If grading scares you, Normal color + this preset still looks great.
Remember: 24fps, double shutter, D-Log M, slow sticks. Cinema.
FlyDronePRDJI Air 3S Field SettingsSharp-Photo Preset
The recipe for tack-sharp stills from a hovering drone.
QUICK SETTINGS
KEY TIPS
- 1Hover drift is the blur enemy — fast shutter beats it every time.
- 2Tap your subject on screen to focus; don't trust infinity.
- 3Shoot AEB for high-contrast scenes and merge later.
- 4Take three frames of everything — pick the sharpest at home.
Remember: Fast shutter, low ISO, tap to focus, shoot three.
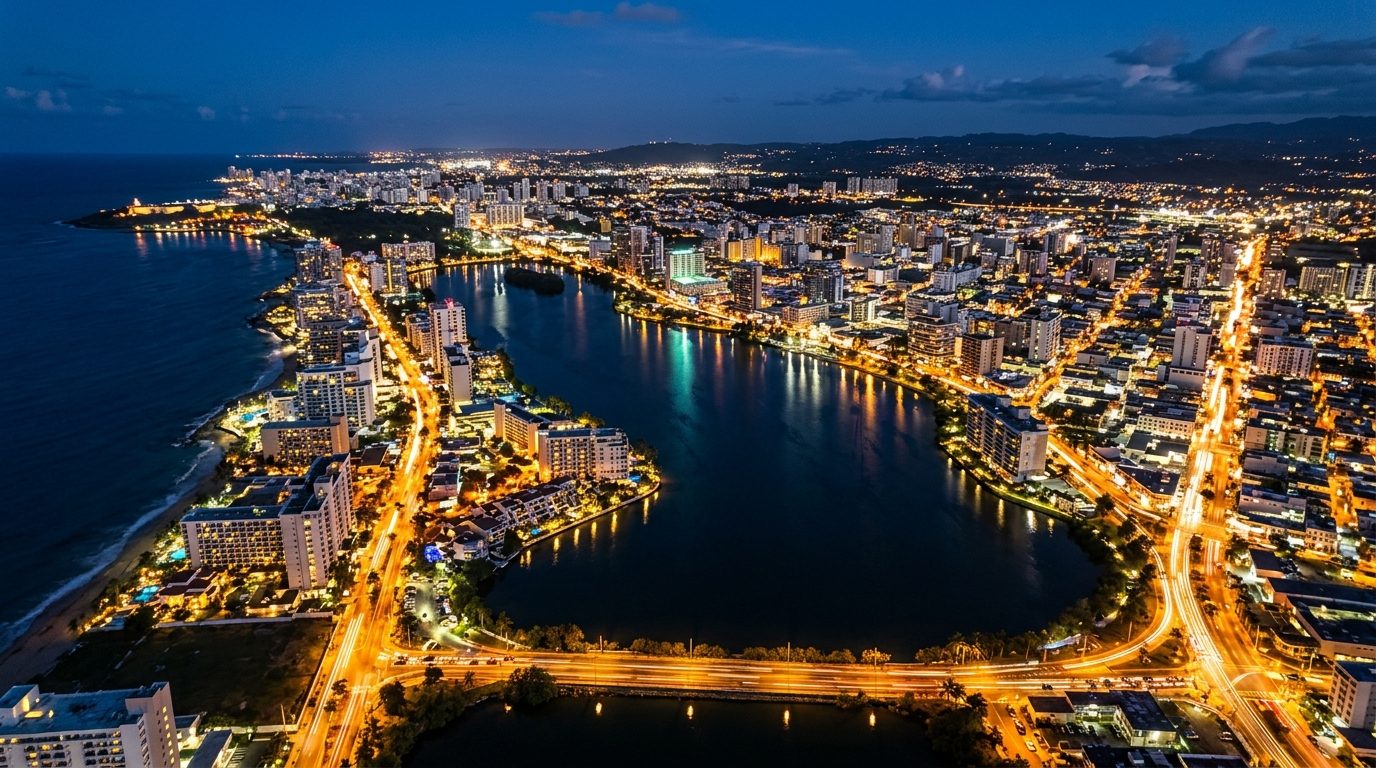
FlyDronePRDJI Air 3S Field SettingsNight Flight Settings
The city glows after dark — but night flying plays by stricter rules.
QUICK SETTINGS
KEY TIPS
- 1The Air 3S's f/1.8 wide camera is your night tool; the 3x tele struggles after dark.
- 2Keep shutter at 1/30s or faster — longer exposures smear with hover drift.
- 3FAA rules: night flight needs an anti-collision strobe visible 3+ miles.
- 4Use the wide camera's Night mode for cleaner high-ISO files.
Remember: Wide camera, ISO 800, 1/30s floor, strobe on, rules first.
FlyDronePRDJI Air 3S Field SettingsGimbal Control Moves
The tilt wheel is your storytelling tool — fly the camera, not just the drone.
QUICK SETTINGS
KEY TIPS
- 1Factory gimbal speed is twitchy — drop pitch speed to ~10–15 for butter.
- 2A slow tilt-up while flying forward feels like the world opening up.
- 3Orbit a subject while gently tilting to keep it framed — practice in an open field.
- 4Jerky gimbal = amateur footage. Every tilt should feel like it's underwater.
Remember: Slow the tilt, combine it with motion, and every clip turns cinematic.
FlyDronePRDJI Air 3S Field SettingsIntelligent Flight Modes
Let the drone fly the hard paths while you watch the frame.
QUICK SETTINGS
KEY TIPS
- 1QuickShots (Dronie, Circle, Helix) produce polished clips in one tap — great for learning framing.
- 2Waypoints let you fly the same route at dawn and dusk — then blend them.
- 3Hyperlapse of El Morro or a busy marina compresses time beautifully.
- 4Always keep eyes on the drone — automation doesn't see wires or birds.
Remember: Automate the path, watch the frame, keep your eyes up.
FlyDronePRDJI Air 3S Field SettingsWide vs 3x Telephoto Strategy
Two cameras, two storytelling weapons — pick per shot.
QUICK SETTINGS
KEY TIPS
- 1Wide tells you where you are; tele tells you what matters.
- 2The 3x compresses distance — mountains stack behind the subject dramatically.
- 3Telephoto is perfect for details you shouldn't fly close to: rooftops, wildlife, people.
- 4Shoot both focal lengths of every scene — the edit will thank you.
Remember: Wide for where. Tele for what. Shoot both.
FlyDronePRDJI Air 3S Field SettingsPanorama Modes
Stitch many frames into one epic sweep — automatically.

QUICK SETTINGS
KEY TIPS
- 1The Air 3S shoots and stitches panoramas by itself — your job is position and light.
- 2Shoot panos in DNG mode for editing flexibility (stitch in software).
- 3Wind shifts the drone between frames — shoot panos in calm air.
- 4A 180° pano from 100m over the coast prints gloriously wide.
Remember: Position + calm air + pano mode = wall-worthy wide shots.
Editing Basics
The second half of every great aerial happens on the ground. · 6 sheets
FlyDronePREditing BasicsThe Basic Edit Workflow
Import → Cull → Edit → Export. Same order, every time.
QUICK SETTINGS
KEY TIPS
- 1Import everything, then delete hard — your future self only wants the winners.
- 2Pick your keepers by sharpness first, composition second.
- 3Edit in this order: crop → exposure → color → detail.
- 4Export a master at full quality; make small copies for sharing.
Remember: Import, cull, edit, export — in that order, every time.
FlyDronePREditing BasicsCrop & Horizon Straightening
A tilted horizon is the #1 tell of a rushed aerial photo.
QUICK SETTINGS
KEY TIPS
- 1Viewers forgive noise and soft focus — never a crooked horizon.
- 2Use the grid in your editor; align the waterline to it.
- 3Crop to strengthen composition: cut empty sky, tighten the subject.
- 4Leave breathing room for platform crops — Instagram trims edges.
Remember: Level the horizon first. It's the cheapest professional upgrade.
FlyDronePREditing BasicsExposure Recovery
Rescue blown skies and dark shadows — if you shot DNG.
QUICK SETTINGS
KEY TIPS
- 1A DNG file hides ~2 stops of recoverable sky that looked pure white.
- 2Lift shadows gently — pushing hard reveals noise in dark areas.
- 3Order matters: exposure first, then highlights/shadows, then contrast.
- 4If the histogram was slammed against a wall in-camera, no edit can save it.
Remember: Highlights down, shadows up, contrast last — DNG makes it possible.
FlyDronePREditing BasicsColor & White Balance
Warm the sunsets, cool the shadows — gently.
QUICK SETTINGS
KEY TIPS
- 1In DNG, white balance is a fresh start — re-set it without penalty.
- 2Vibrance boosts muted colors only; Saturation boosts everything and burns skin tones.
- 3HSL sliders: nudge aqua/blue to make the water sing without fake color.
- 4If it looks radioactive, you went too far. Real Caribbean color needs little help.
Remember: WB first, vibrance over saturation, and protect the turquoise.
FlyDronePREditing BasicsSharpening & Noise Reduction
Clean first, sharpen last — and never sharpen the sky.
QUICK SETTINGS
KEY TIPS
- 1Noise reduction before sharpening — otherwise you sharpen the grain.
- 2High-ISO night shots need more NR; daylight ISO 100 barely needs any.
- 3Mask smooth areas (sky, water) so sharpening only touches edges.
- 4Too much NR = plastic watercolor look. Keep some texture alive.
Remember: Denoise first, sharpen edges only, keep some texture.
FlyDronePREditing BasicsExporting for Instagram & Print
The right size for the right place — one master, many copies.
QUICK SETTINGS
KEY TIPS
- 1Instagram compresses everything — export at exactly their sizes to stay sharp.
- 2Portrait 4:5 fills more phone screen than landscape — more eyeballs.
- 3For prints, never upscale; a sharp 12MP Air 3S file prints beautifully at 16×20.
- 4Name files with place + date: 'flamenco-beach_2026-08.jpg' — future you says thanks.
Remember: One master file, right-sized copies, smart names.
Video Craft & Cinematic Moves
Movement, frame rates and flight recipes that make footage feel like film. · 7 sheets
FlyDronePRVideo Craft & Cinematic Moves5 Signature Drone Moves
Master these five and every location becomes a film set.
QUICK SETTINGS
KEY TIPS
- 1Orbit: keep the subject centered and circle slowly — the background rotation does the magic.
- 2Reveal: start low behind cover, rise and push forward to unveil the scene.
- 3Dolly-in: a dead-slow push toward the subject builds tension like nothing else.
- 4Parallax: slide sideways with a near object in frame — near moves fast, far moves slow. Pure depth.
Remember: One move, one clip, slow hands. Combine moves in the edit, not in the air.
FlyDronePRVideo Craft & Cinematic MovesFrame Rates in the Field
Decide before takeoff — changing in the air costs you the light.
QUICK SETTINGS
KEY TIPS
- 124fps gives the filmic motion blur audiences read as 'cinematic'.
- 260fps keeps fast subjects smooth — waves, wake, traffic — and allows 50% slow-down in the edit.
- 3Higher frame rate = faster shutter = more light needed. On cloudy evenings, drop to 30.
- 4Never mix frame rates on one card for one scene — pick it on the ground.
Remember: 24 for beauty, 60 for action, 120 for drama. Decide on the ground.
FlyDronePRVideo Craft & Cinematic MovesQuickShot Recipes
One-tap moves — here's which subject each one loves.
QUICK SETTINGS
KEY TIPS
- 1Dronie pulls back and up from you — stand somewhere the backdrop deserves it.
- 2Circle works on anything with presence: a rock formation, a lone tree, a boat.
- 3Helix needs height to breathe — use it on vertical subjects in open areas.
- 4Rocket rises straight up with the camera locked down — pure pattern reveal.
Remember: Match the QuickShot to the subject's shape: vertical = Helix, flat = Rocket, you = Dronie.
FlyDronePRVideo Craft & Cinematic MovesHyperlapse Flight Plan
Compress twenty minutes of island life into ten seconds.
QUICK SETTINGS
KEY TIPS
- 1The drone shoots one frame every 2 seconds while crawling along — patience is the recipe.
- 2Waypoints let you repeat the exact route at different hours and blend day into night.
- 3Subjects that move slowly in real life shine: clouds, harbor traffic, changing tides.
- 4Battery check: a long hyperlapse can eat most of one battery.
Remember: Slow drone, 2-second interval, moving subject — time does the rest.
FlyDronePRVideo Craft & Cinematic MovesActiveTrack, Safely
Follow-me shots are magic — until a branch reminds you the drone only sees forward.
QUICK SETTINGS
KEY TIPS
- 1The Air 3S has omnidirectional sensing — trust it, but verify: no thin wires or bare branches.
- 2Set follow distance before you start moving, not during.
- 3Walking shots: keep the sun behind the drone so your subject stays lit.
- 4If it loses you, it hovers or returns — know which mode you set before launch.
Remember: Sensors assist, they don't replace your eyes. Open field first, fancy later.
FlyDronePRVideo Craft & Cinematic MovesGrading D-Log M Footage
Flat gray footage is a feature — four steps bring it to life.
QUICK SETTINGS
KEY TIPS
- 1D-Log M captures more dynamic range but looks washed out — always convert first with the official LUT.
- 2Free grading: DaVinci Resolve handles DJI footage beautifully.
- 3After the LUT, set white balance, then contrast, then saturation — in that order.
- 4Caribbean water barely needs help; if the turquoise glows neon, pull aqua saturation back.
Remember: LUT first, balance, contrast, saturation. Flat in, film out.
FlyDronePRVideo Craft & Cinematic MovesExporting Video for Reels & YouTube
One flight, every platform — export for where it will be watched.
QUICK SETTINGS
KEY TIPS
- 1Vertical crops from 4K wide footage still look sharp — frame your subject center-ish when flying.
- 2Cut to the beat: 7–15 seconds holds attention on Reels.
- 3YouTube rewards quality: export 4K even if you shot cropped — it assigns a better codec.
- 4Name exports by platform: 'rincon-sunset_reels.mp4' vs 'rincon-sunset_yt4k.mp4'.
Remember: Vertical for phones, 4K for YouTube, originals forever.